
Dell PowerEdge: Configuring RAID
Whenever we provision a new Dell PowerEdge server, one of the first tasks we tackle is configuring the storage pool using RAID. Let us take a look at how this configuration is performed on a Dell PowerEdge R640 Rack Server.
Configuring RAID
Step 1: Decide which RAID level to use
Choosing the right RAID level depends on three main factors: the number of disks you have, the usable capacity you require, and the level of fault tolerance you need. Different RAID configurations require a minimum number of disks (for example, RAID 5 requires at least three, RAID 6 requires four), and options with higher redundancy (like mirroring or dual parity) will reduce usable capacity but improve resilience. Ultimately, your choice balances storage efficiency against risks—some setups prioritise performance, others prioritise data protection. If you're not familiar with the various RAID levels, do check out the article linked below.

Step 2: Enter the Lifecycle controller
Power on or restart the server. As it boots up, watch for the Dell splash screen where key prompts are displayed (typically in the top-left corner). When “Press F10 for Lifecycle Controller” appears, simply press F10 to launch the Lifecycle Controller.
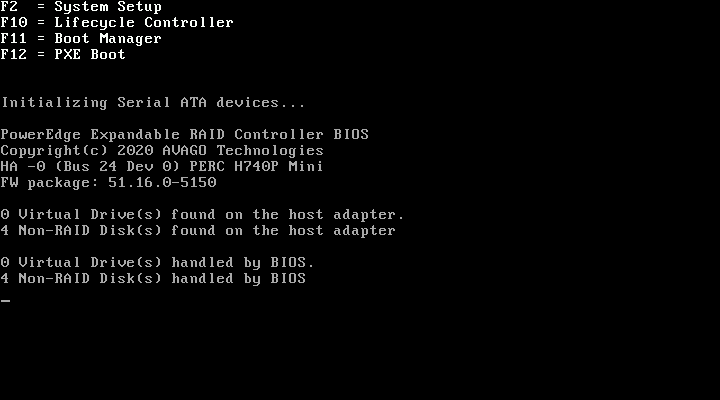
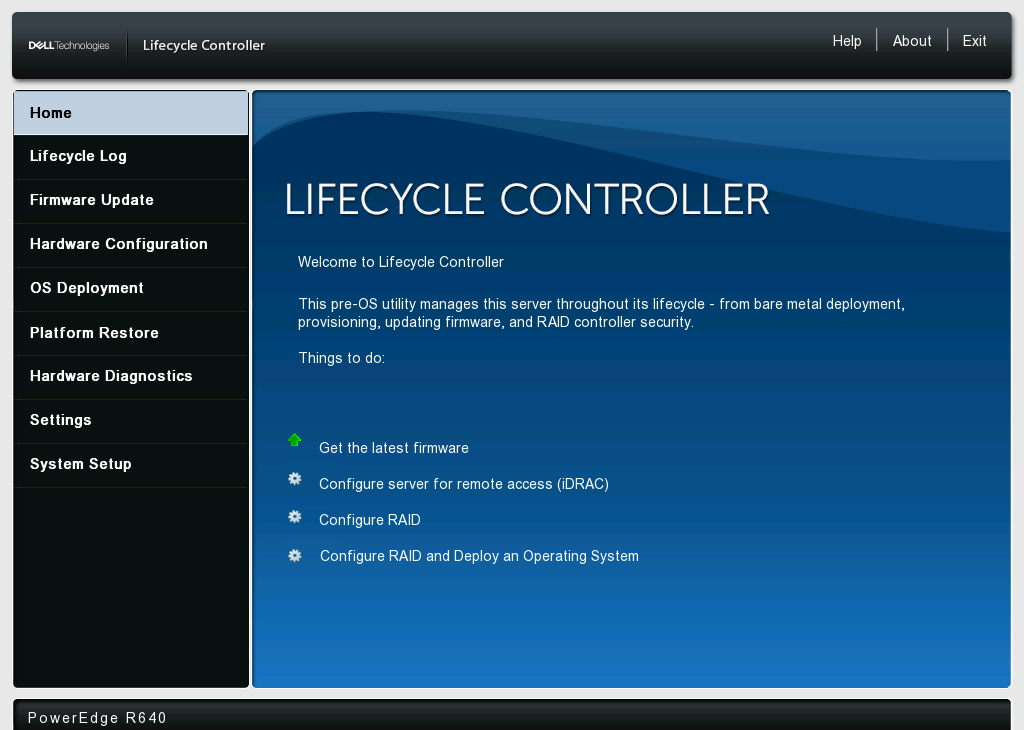
If you manage to hit the key in time, you should be greeted with the Lifecycle controller's user interface.
If you miss the prompt, reboot the server and press F10 every two seconds until the system confirms entry into the Lifecycle Controller.
Step 3: Enter the Dell PERC Configuration Utility
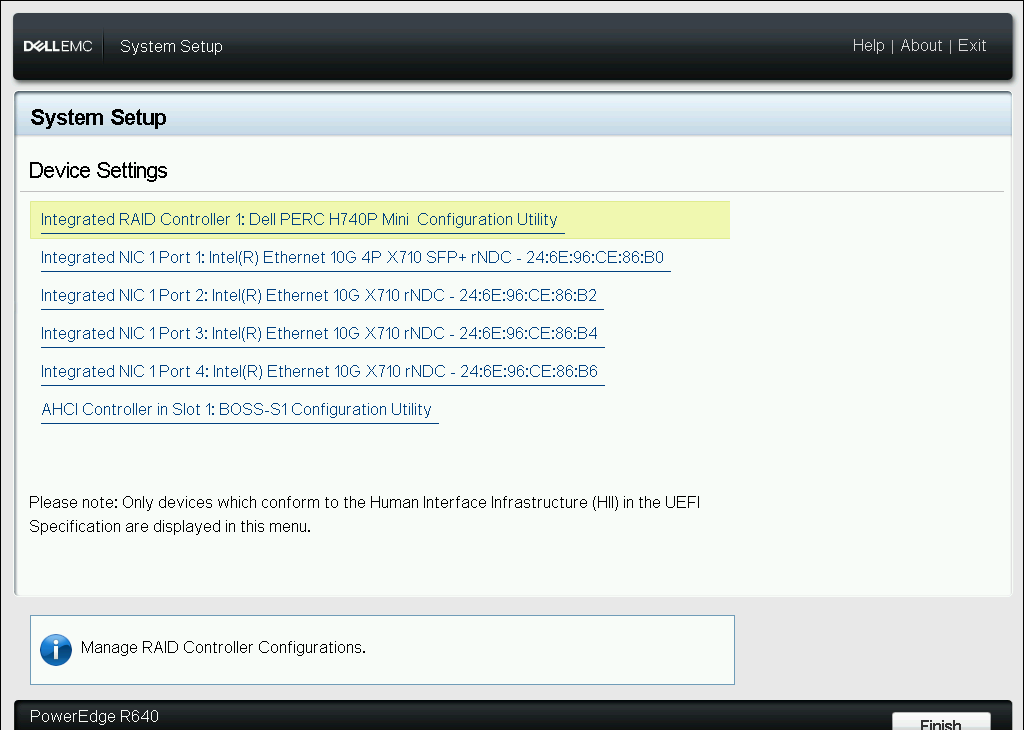
Once inside the Lifecycle Controller, navigate to System Setup → Advanced Hardware Configuration → Device Settings. On the Device Settings screen, you’ll see detected devices such as NICs and RAID controllers. Locate your RAID controller in the list and select it to launch its configuration utility. In this example, I will select the Dell PERC H740P mini RAID controller.
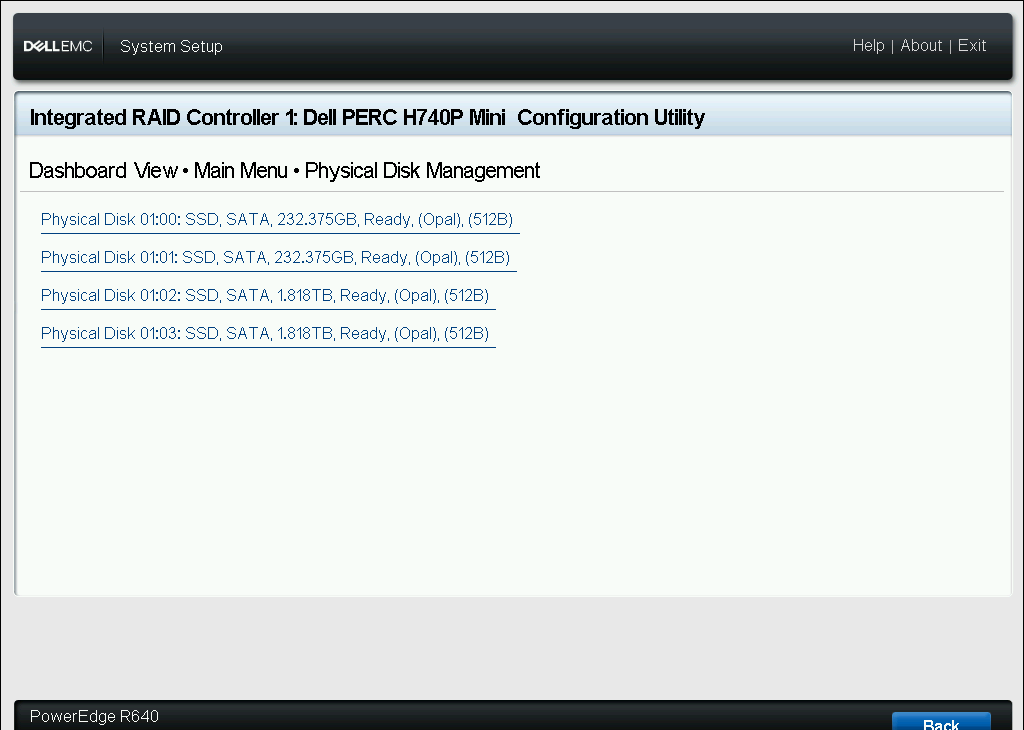
After which, navigate to Main Menu → Physical Disk Management and check that all of the data storage drives are detected by the RAID controller. In this example, I have attached 4 SSDs and all 4 drives are detected correctly.
Step 4: Configure the RAID array
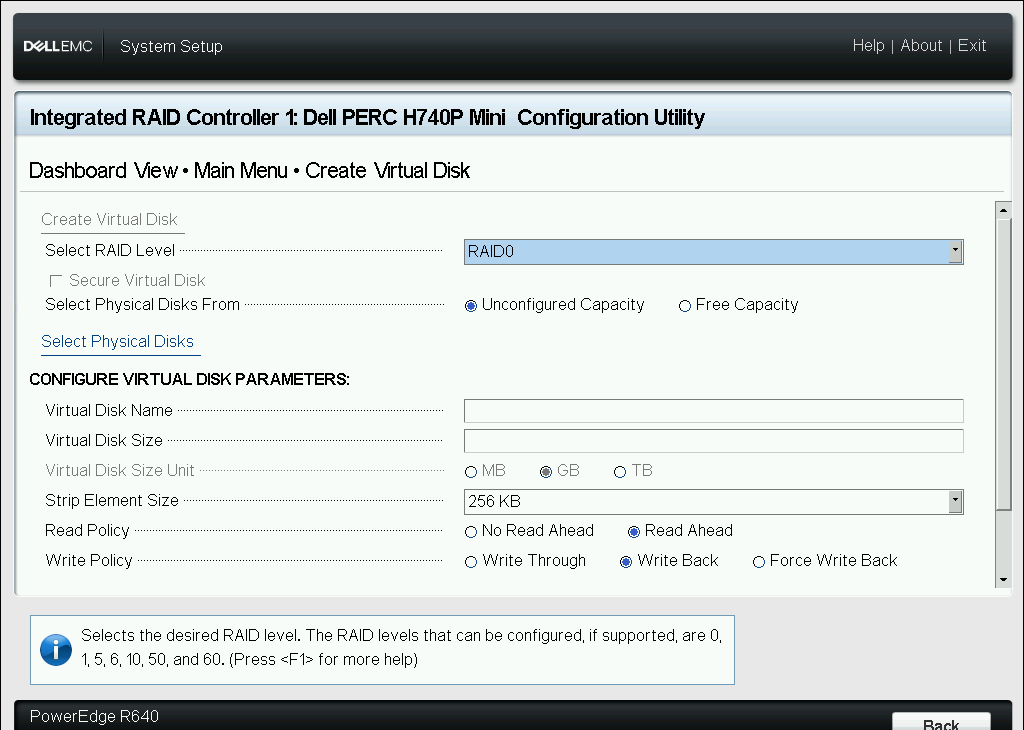
Once you've ensured that everything is in order, head back to the main menu and navigate to Configuration Management → Create Virtual Disk to create the RAID array. Firstly, you'll need to select the RAID level. Expand the Select RAID Level dropdown menu and choose the option that's most appropriate for your use case. In this example, I had selected RAID 0 as my RAID level.
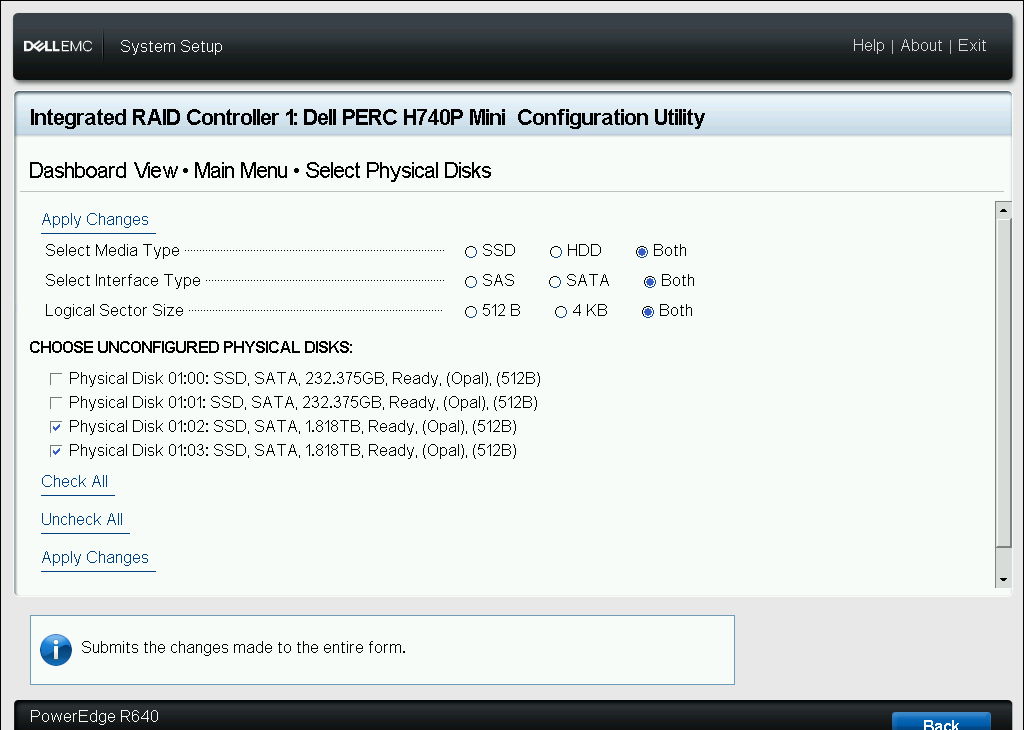
Next, you'll need to select the physical disks that should be part of the array. Click on Select Physical Disks, choose the corresponding disks, and click on Apply Changes to confirm your selection. In this example, I selected both of my 1.818TB drives.
Lastly, you will need to give the array a name. Select the Virtual Disk Name textbox and enter your preferred name. You may leave the other fields on their default values. In this example, I named my array vDisk0.

Once you've completed all of the steps above, verify that the capacity computed in the Virtual Disk Size textbox is in line with what you expect. Once you're ready, click on Create Virtual Disk to create the array.
Summary
And that’s all you need to create a RAID array on your Dell PowerEdge server. The Lifecycle Controller and PERC utility guide you intuitively through the setup process, making it easy to go from raw drives to a working virtual disk. If you’re embarking on a more complex storage design—like tiered SSD/HDD pools, hot spares, encryption, or automation via iDRAC and Redfish—reach out to us via the "Contact Us" form on our main site. We’d be happy to help tailor a solution to your needs!